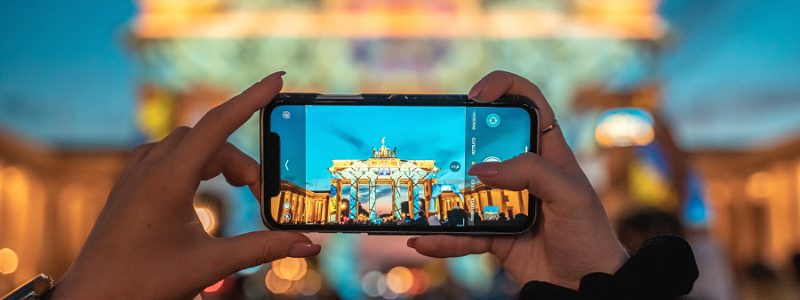
Photo editing may seem daunting but starting from somewhere is better than remaining status quo. If you’re a blank canvas, Snapseed is a free app commonly used by content creators globally for photo edits. In addition to various filters, crop functions and effects, one can edit specific areas with the selective tool. Keep reading to learn more about some of how favourite features!
Remove unwanted objects (or people)
It’s a total bummer when you finally chance upon your dream picture only to find that you’re sharing the frame with someone else. But fret not! With the healing tool on Snapseed, you can remove anything and anyone from your photo. This function will be especially handy if you’re taking photos in areas with high traffic.
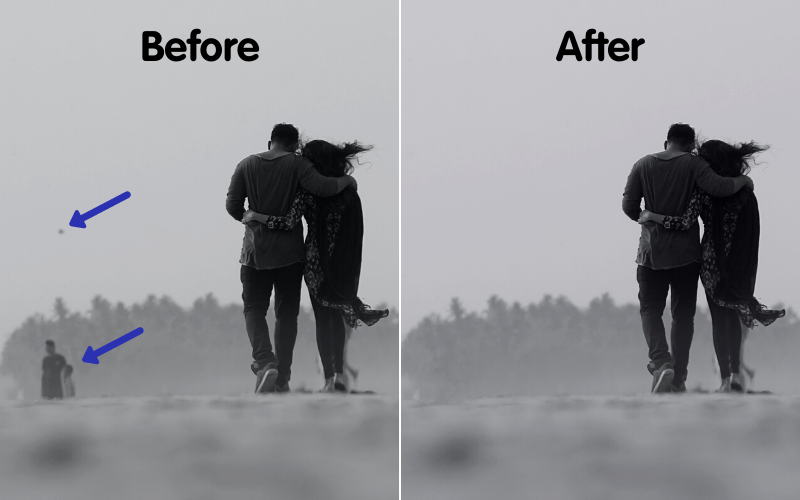
The healing tool is all it takes but if you want a cleaner edit, you may proceed with the double exposure tool.
Refer to our step-by-step guide below for more details:
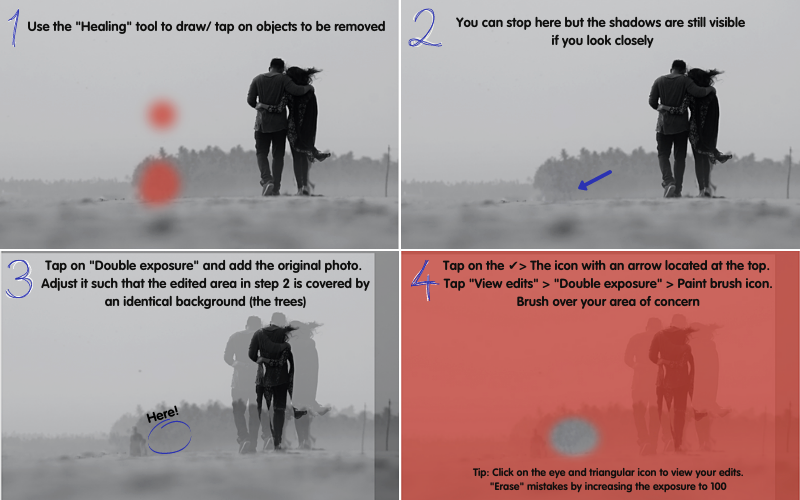
Click here for the video tutorial.
Expand photos
Need help with resizing your uploads for the gram? Simply tap on the expand tool. From there on, you’ll be greeted with 3 different border options - smart, white and black - for your photo expansion.
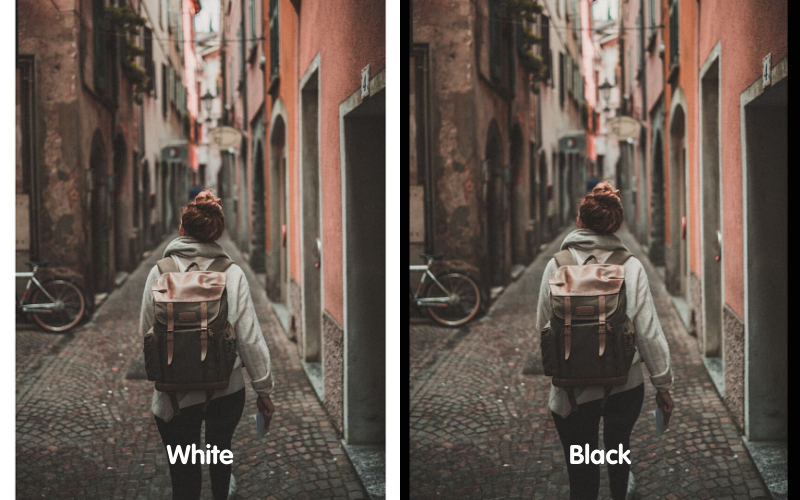
Similar to the healing tool, the smart option essentially duplicates the surrounding background. Hence, this works best for photos with simpler backgrounds. As seen below, the right side of the expanded image looks more natural than that of the left.

Clone objects and people
Always wanted to capture multiple copies of yourself on camera?

Image: @kennov8
Well, now you can with the double exposure tool. For best results, we recommend using a tripod and getting a bluetooth remote if you’re shooting alone.
Once you’ve got your pictures, import your first photo on Snapseed and tap on double exposure. Add your second photo and tap on Blending Modes (the icon in the middle) to select the “Subtract” option. Next, hit the raindrop icon to max out the opacity. After that, view your double exposure edits by tapping on the icon at the top with an arrow. Draw over the area where your second image should overlap and you’re done. View the video tutorial here.
Tip: Keep your tripod and phone in the same position while you switch up your poses so that editing will be less of a hassle. With this tool, you can even clone objects and change your backgrounds - the sky’s the limit!
Save images in PNG format
JPG and PNG are common file compression methods and using them correctly would help you save large files better, without affecting the quality.
If you’re unaware, you should save photos as JPG if they contain vibrant colours (photographs and in-game screenshots). On the flipside, PNG is more ideal for desktop screenshots and designs with dull colours.
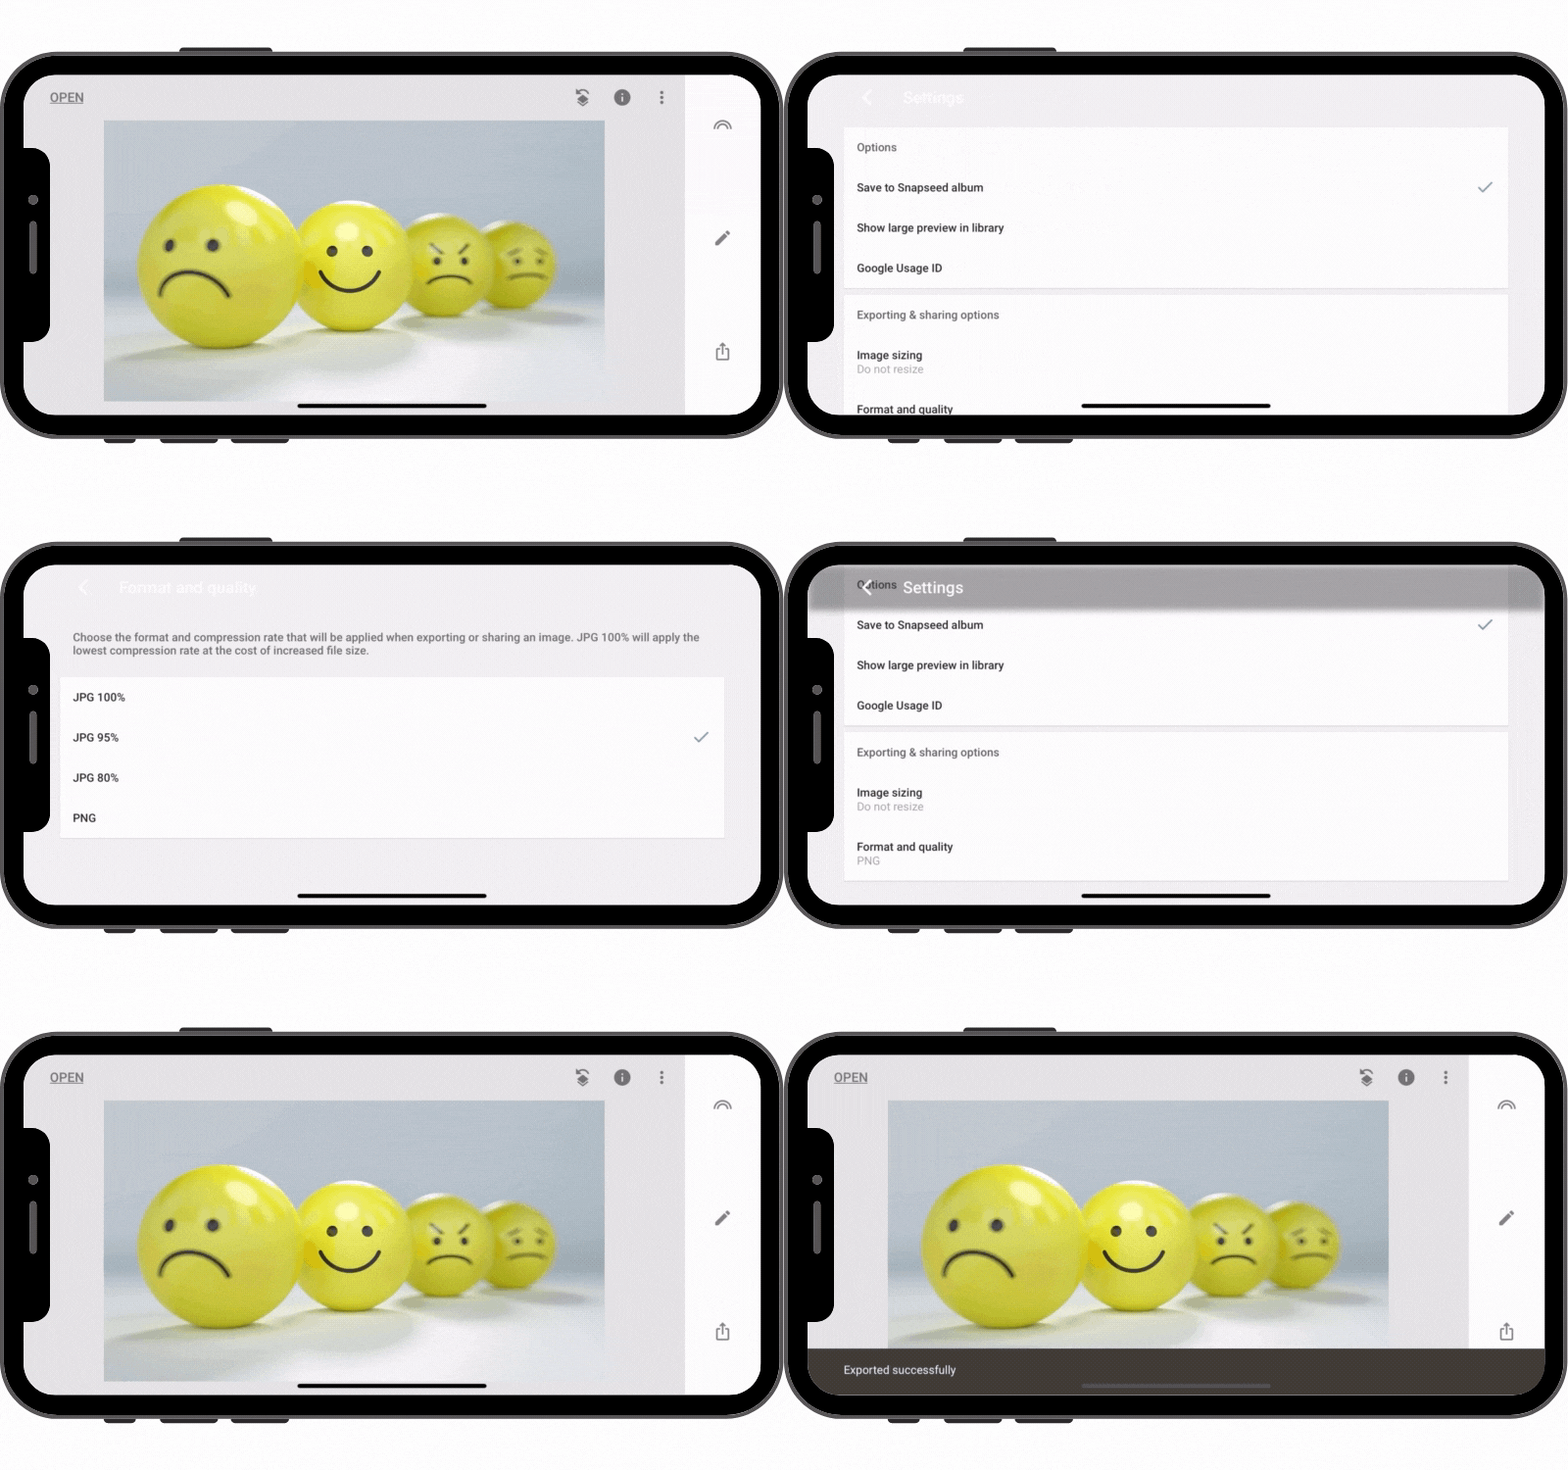
To save images in PNG format on Snapseed, import your photo and go to settings by tapping on the icon at the top right corner. Thereafter, tap on “Format and quality” and select “PNG”.
This function is great for creating and adding watermarks to your visuals using the double exposure tool mentioned earlier. You can even customize the background of your watermark logo if you’d like.
Ready to unleash your creativity? Download the Partipost app to post for your favourite brands online and earn some side income!


